Add a text label to your work photo instantly with the GPS Map Camera.

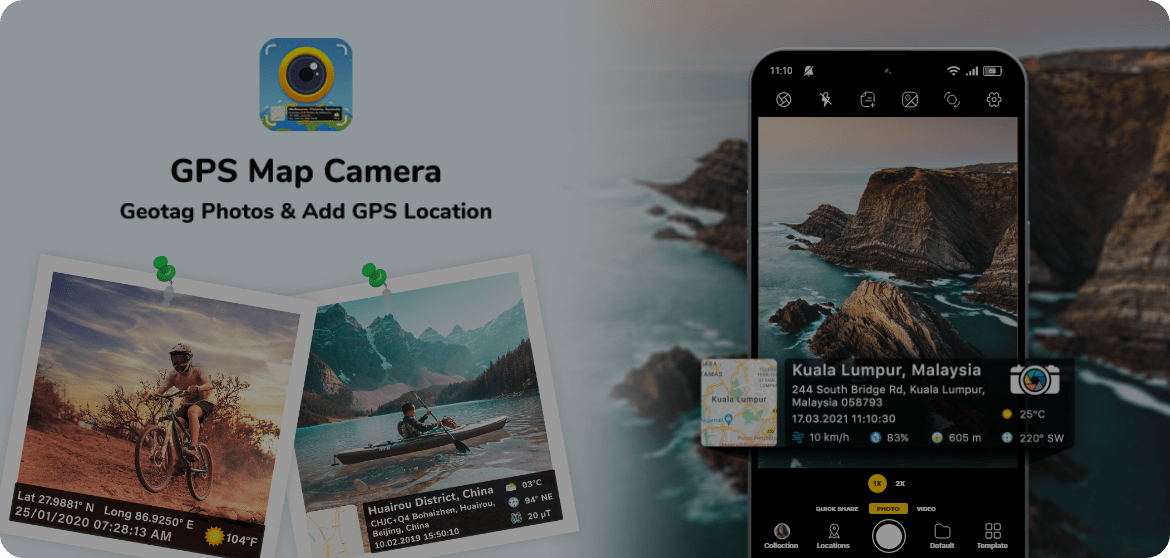
Auto-stamp your photos & videos with accurate location, date, time, map, logo, and more. Perfect for professionals, travelers, & field teams.
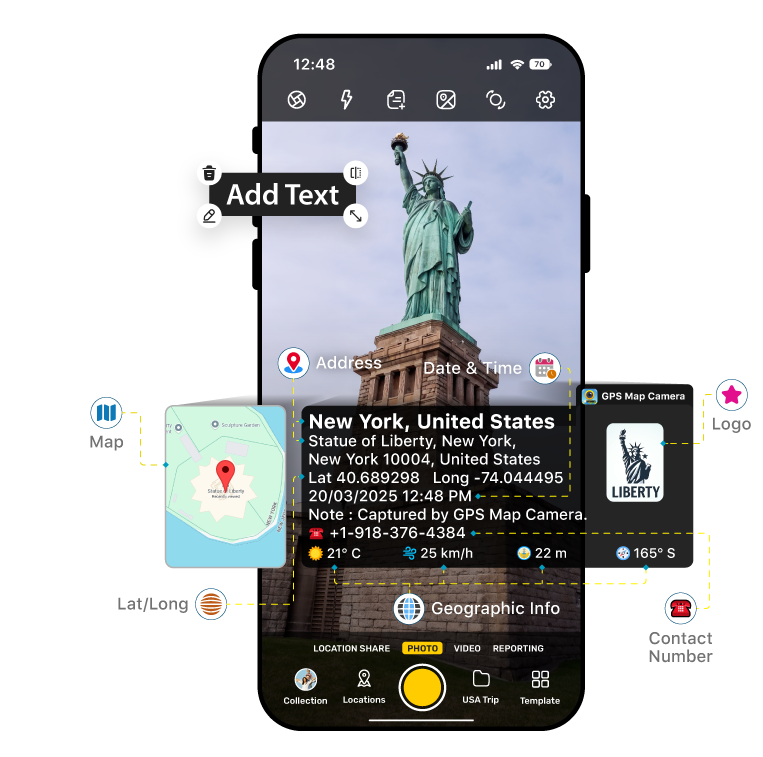
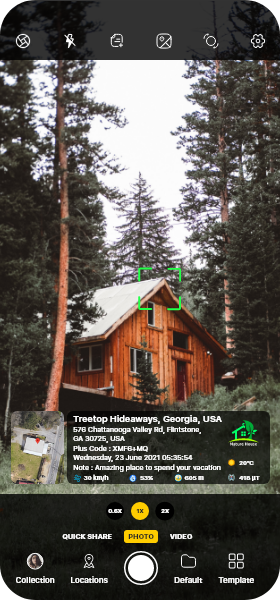
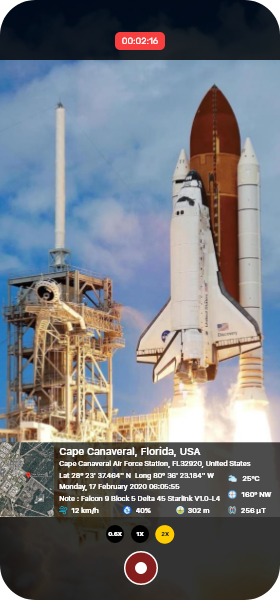
Capture photos with real GPS coordinates & map overlay
Date & time stamps that can’t be edited
Add project name, notes, phone number & your brand logo
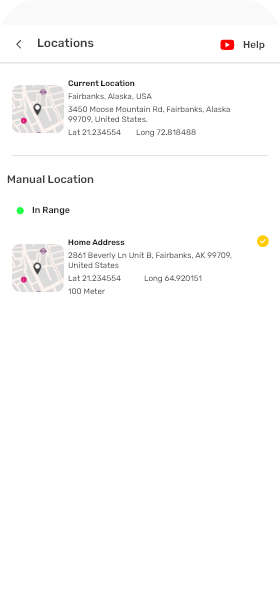
Choose automatic or manual location input for flexibility
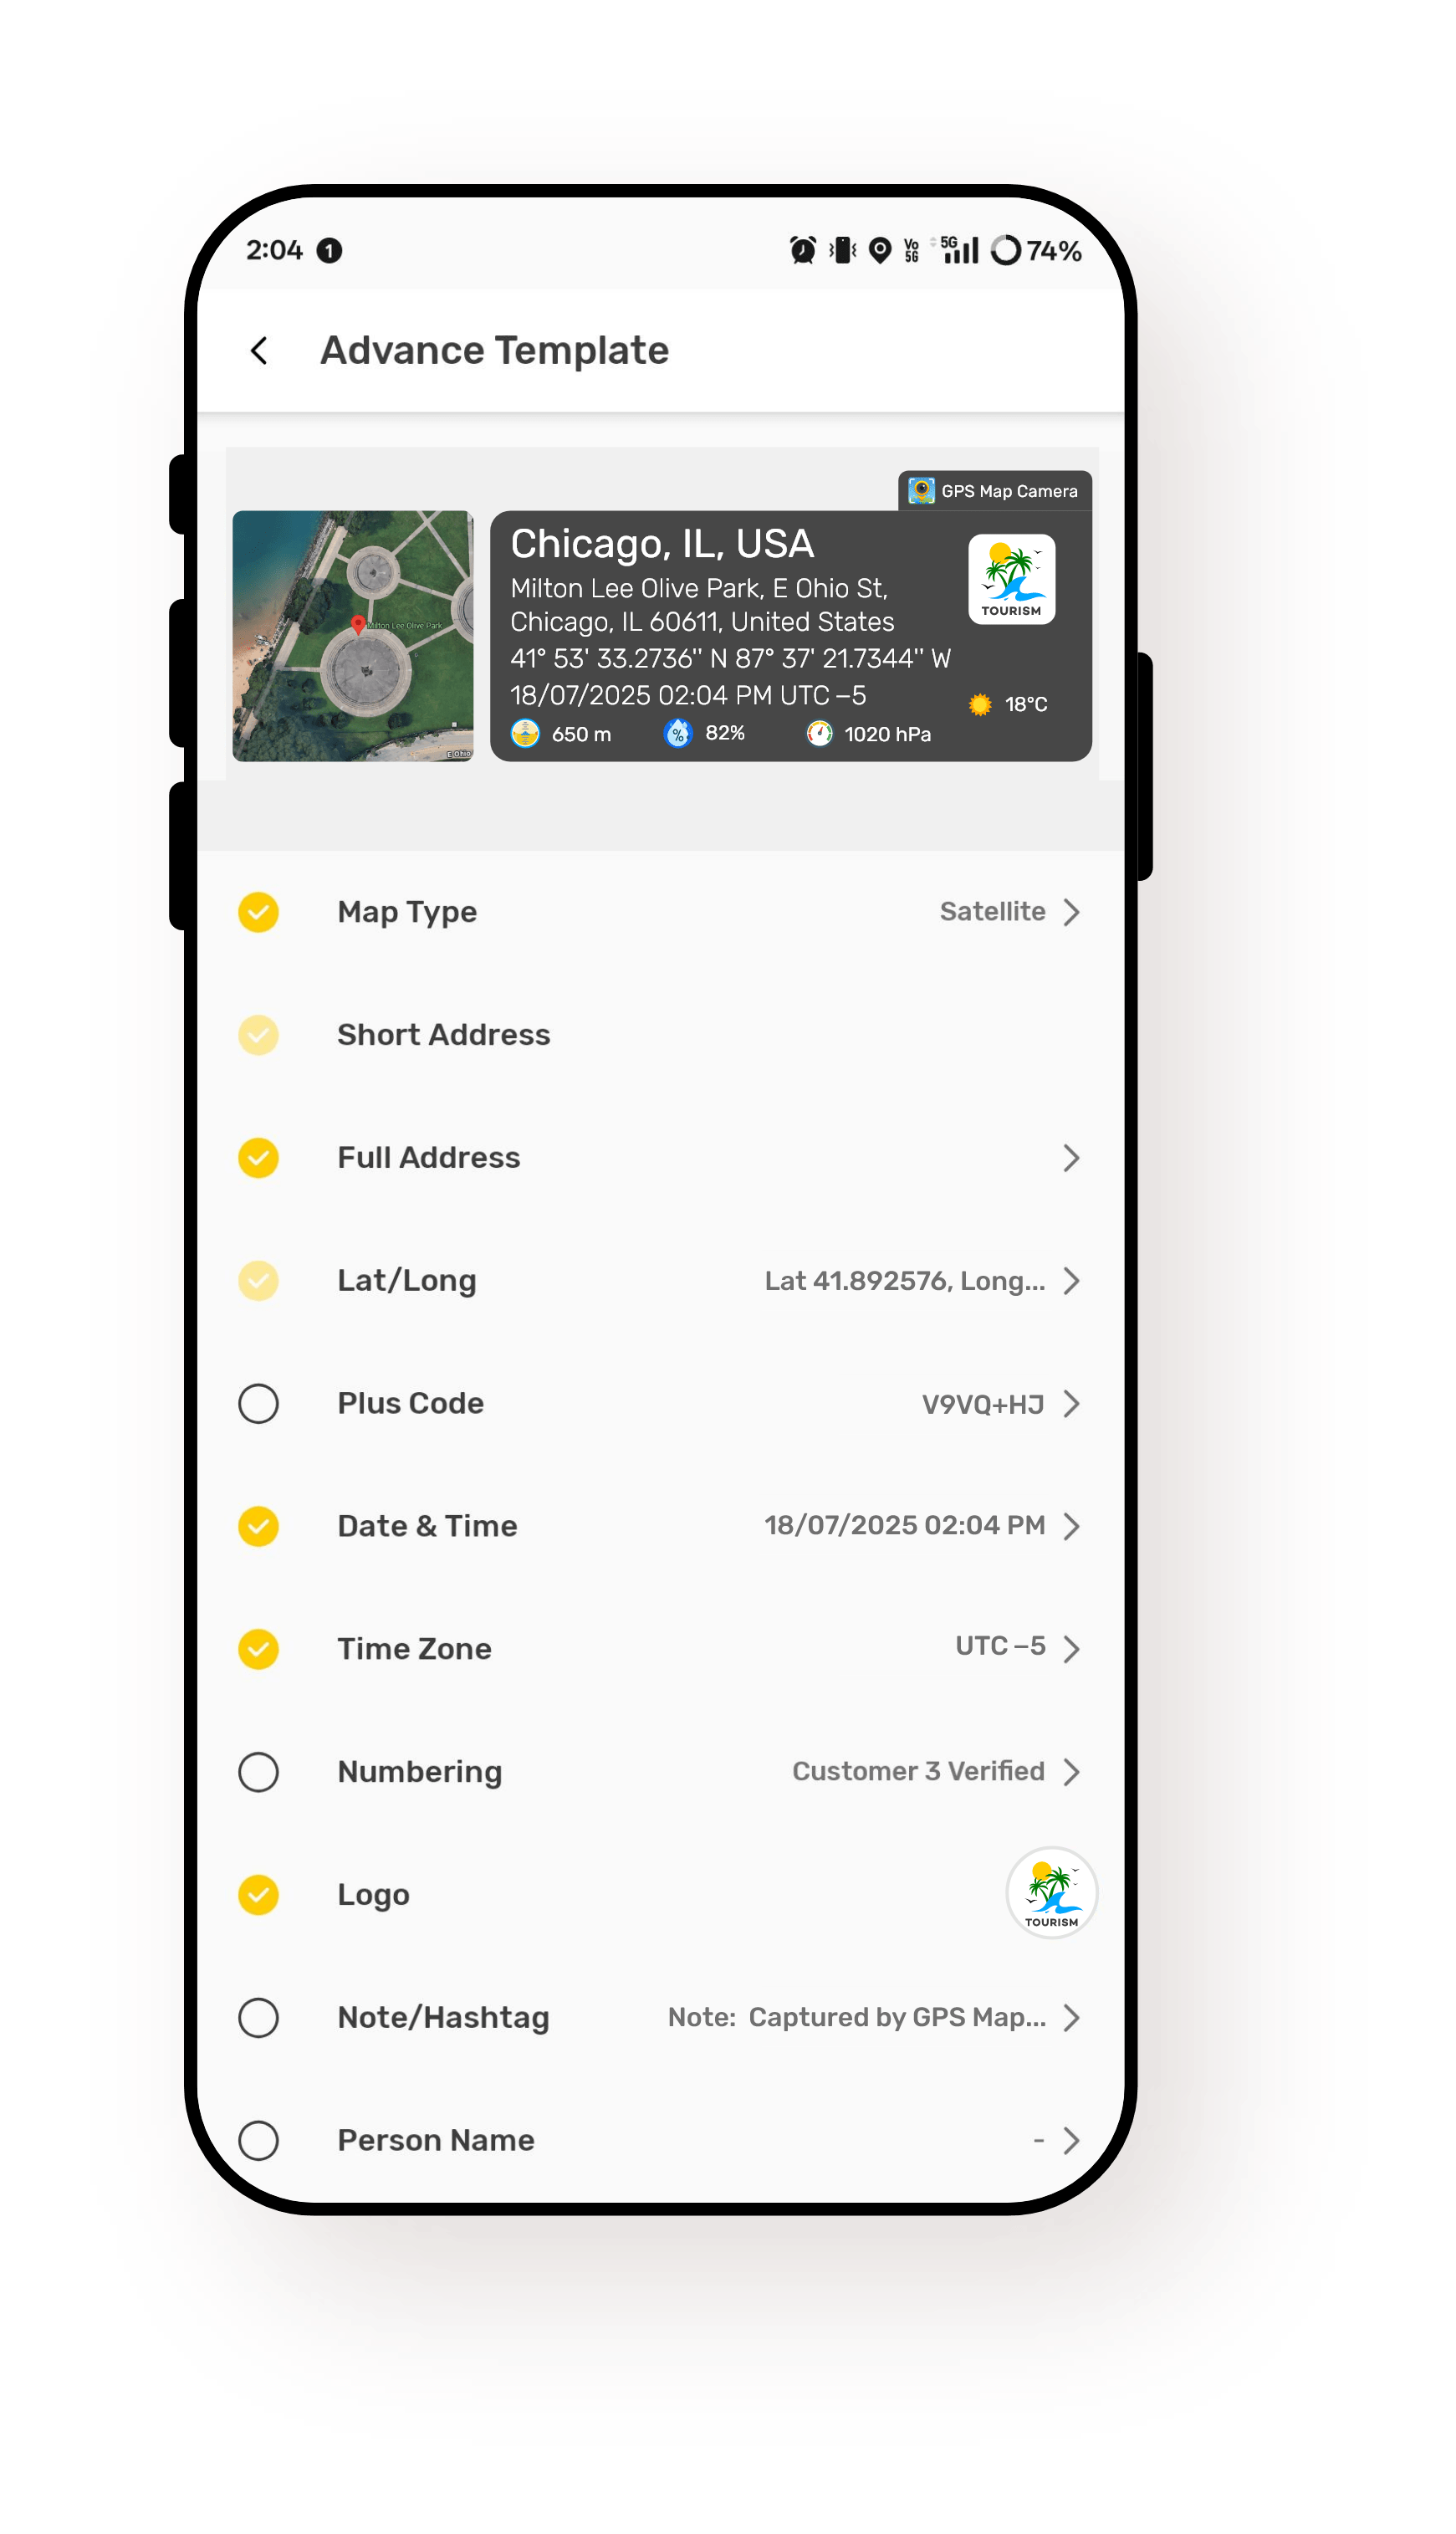
Used by millions of real estate, construction & contractor, and remote professionals
If you’ve recently purchased a device compatible with the ZH LW03 remote control—commonly paired with LED strip lights, projector screens, or certain smart home IR controllers—finding the original 2021 manual can be challenging. Many manufacturers release universal “ZH” series remotes, and the LW03 model is a popular variant from 2021.
This article serves as a comprehensive replacement manual for the ZH LW03 remote control (2021 edition). We’ll cover button functions, pairing instructions, battery replacement, common issues, and where to download the official PDF.
Here’s a concise write-up for the ZH LW03 Remote Control (2021 model) based on common features found in universal/set-top-box remotes from that period. If you need specific button mappings or programming codes, please refer to the device’s original packaging or contact the supplier.
To link with Amazon Alexa or Google Home:
Most 2021 ZH LW03 remotes use a learn mode for RF pairing. Follow these steps:
⚠ WARNING: Do not submerge in water. While it works through walls, it is not waterproof. Keep away from curious toddlers who love to press buttons.
Thank you for choosing ZH-LW03. Go forth and control the light.
The is a specialized infrared (IR) and radio frequency (RF) remote control designed specifically for Chigo air conditioning units. While it is a sophisticated replacement for the original, its "story" is one of simplicity and functional reliability rather than complex programming. Core Story: The No-Programming Solution
Unlike universal remotes that require entering codes from a manual, the
is built with pre-programmed IR codes that match the industry standard for the Chigo series. This makes it a "plug-and-play" device where the setup typically involves nothing more than inserting batteries. Key Specifications & Performance
Operating Range: It allows control from a distance of over 8 metres.
Durability: Constructed from high-grade ABS material, it is engineered to be wear-resistant and can maintain functionality in temperatures up to 105°C.
Power: It requires 2 AAA batteries (usually not included in the package).
Connectivity: Uses Infrared technology to communicate directly with the AC unit. Operating Instructions & Maintenance
Although a physical manual is often absent from the packaging, the operation is intuitive:
Immediate Use: Insert fresh AAA batteries. In most cases, the remote will immediately control your Chigo AC without further setup.
Button Features: Provides access to all standard AC features, including temperature control, fan speed, timer, and sleep mode. Care Tips:
Avoid direct sunlight and temperatures above 40°C or below 0°C to prevent deformation.
Do not use harsh chemicals like benzene or paint thinner for cleaning; instead, use a slightly damp cloth with neutral detergent.
If the remote becomes unresponsive, first check or replace the batteries.
For those using similar ZH-series remotes (like the ZH/JT-03), you can often toggle between Celsius and Fahrenheit by holding the "Mode" or "Settings" button for 3-5 seconds until the display blinks.
Before using the remote, install the batteries correctly:
⚠️ Important warning from the 2021 manual:
Do not mix old and new batteries. Remove batteries if the remote will not be used for over one month to prevent corrosion.


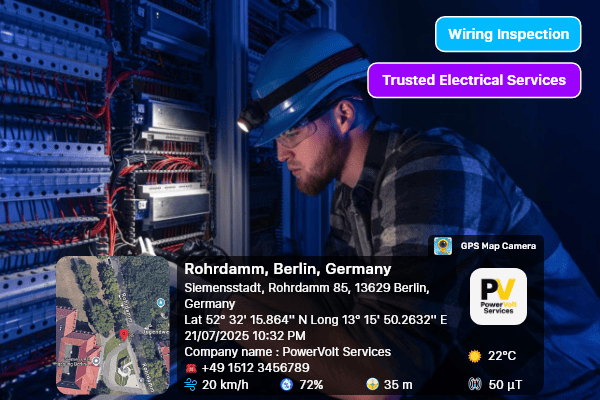
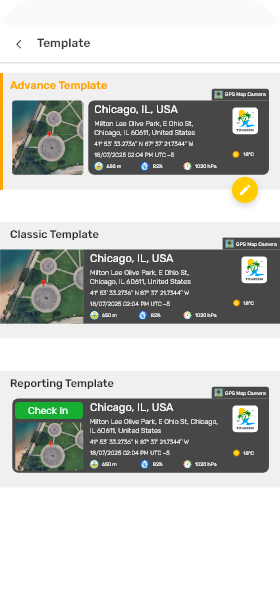
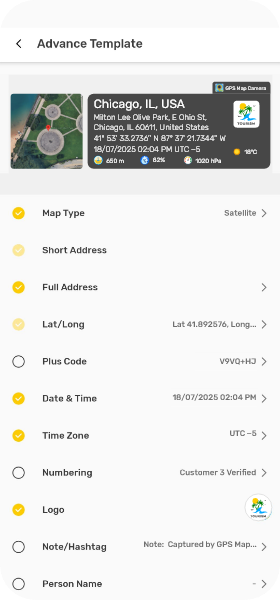
GPS Map Camera gives you full control to create photo documentation that’s authentic, accurate, and impossible to fake. Whether you’re on a site, in the field, or documenting memories, every image becomes verifiable proof
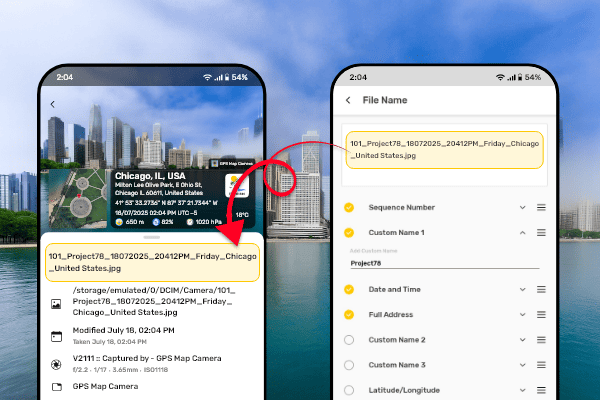
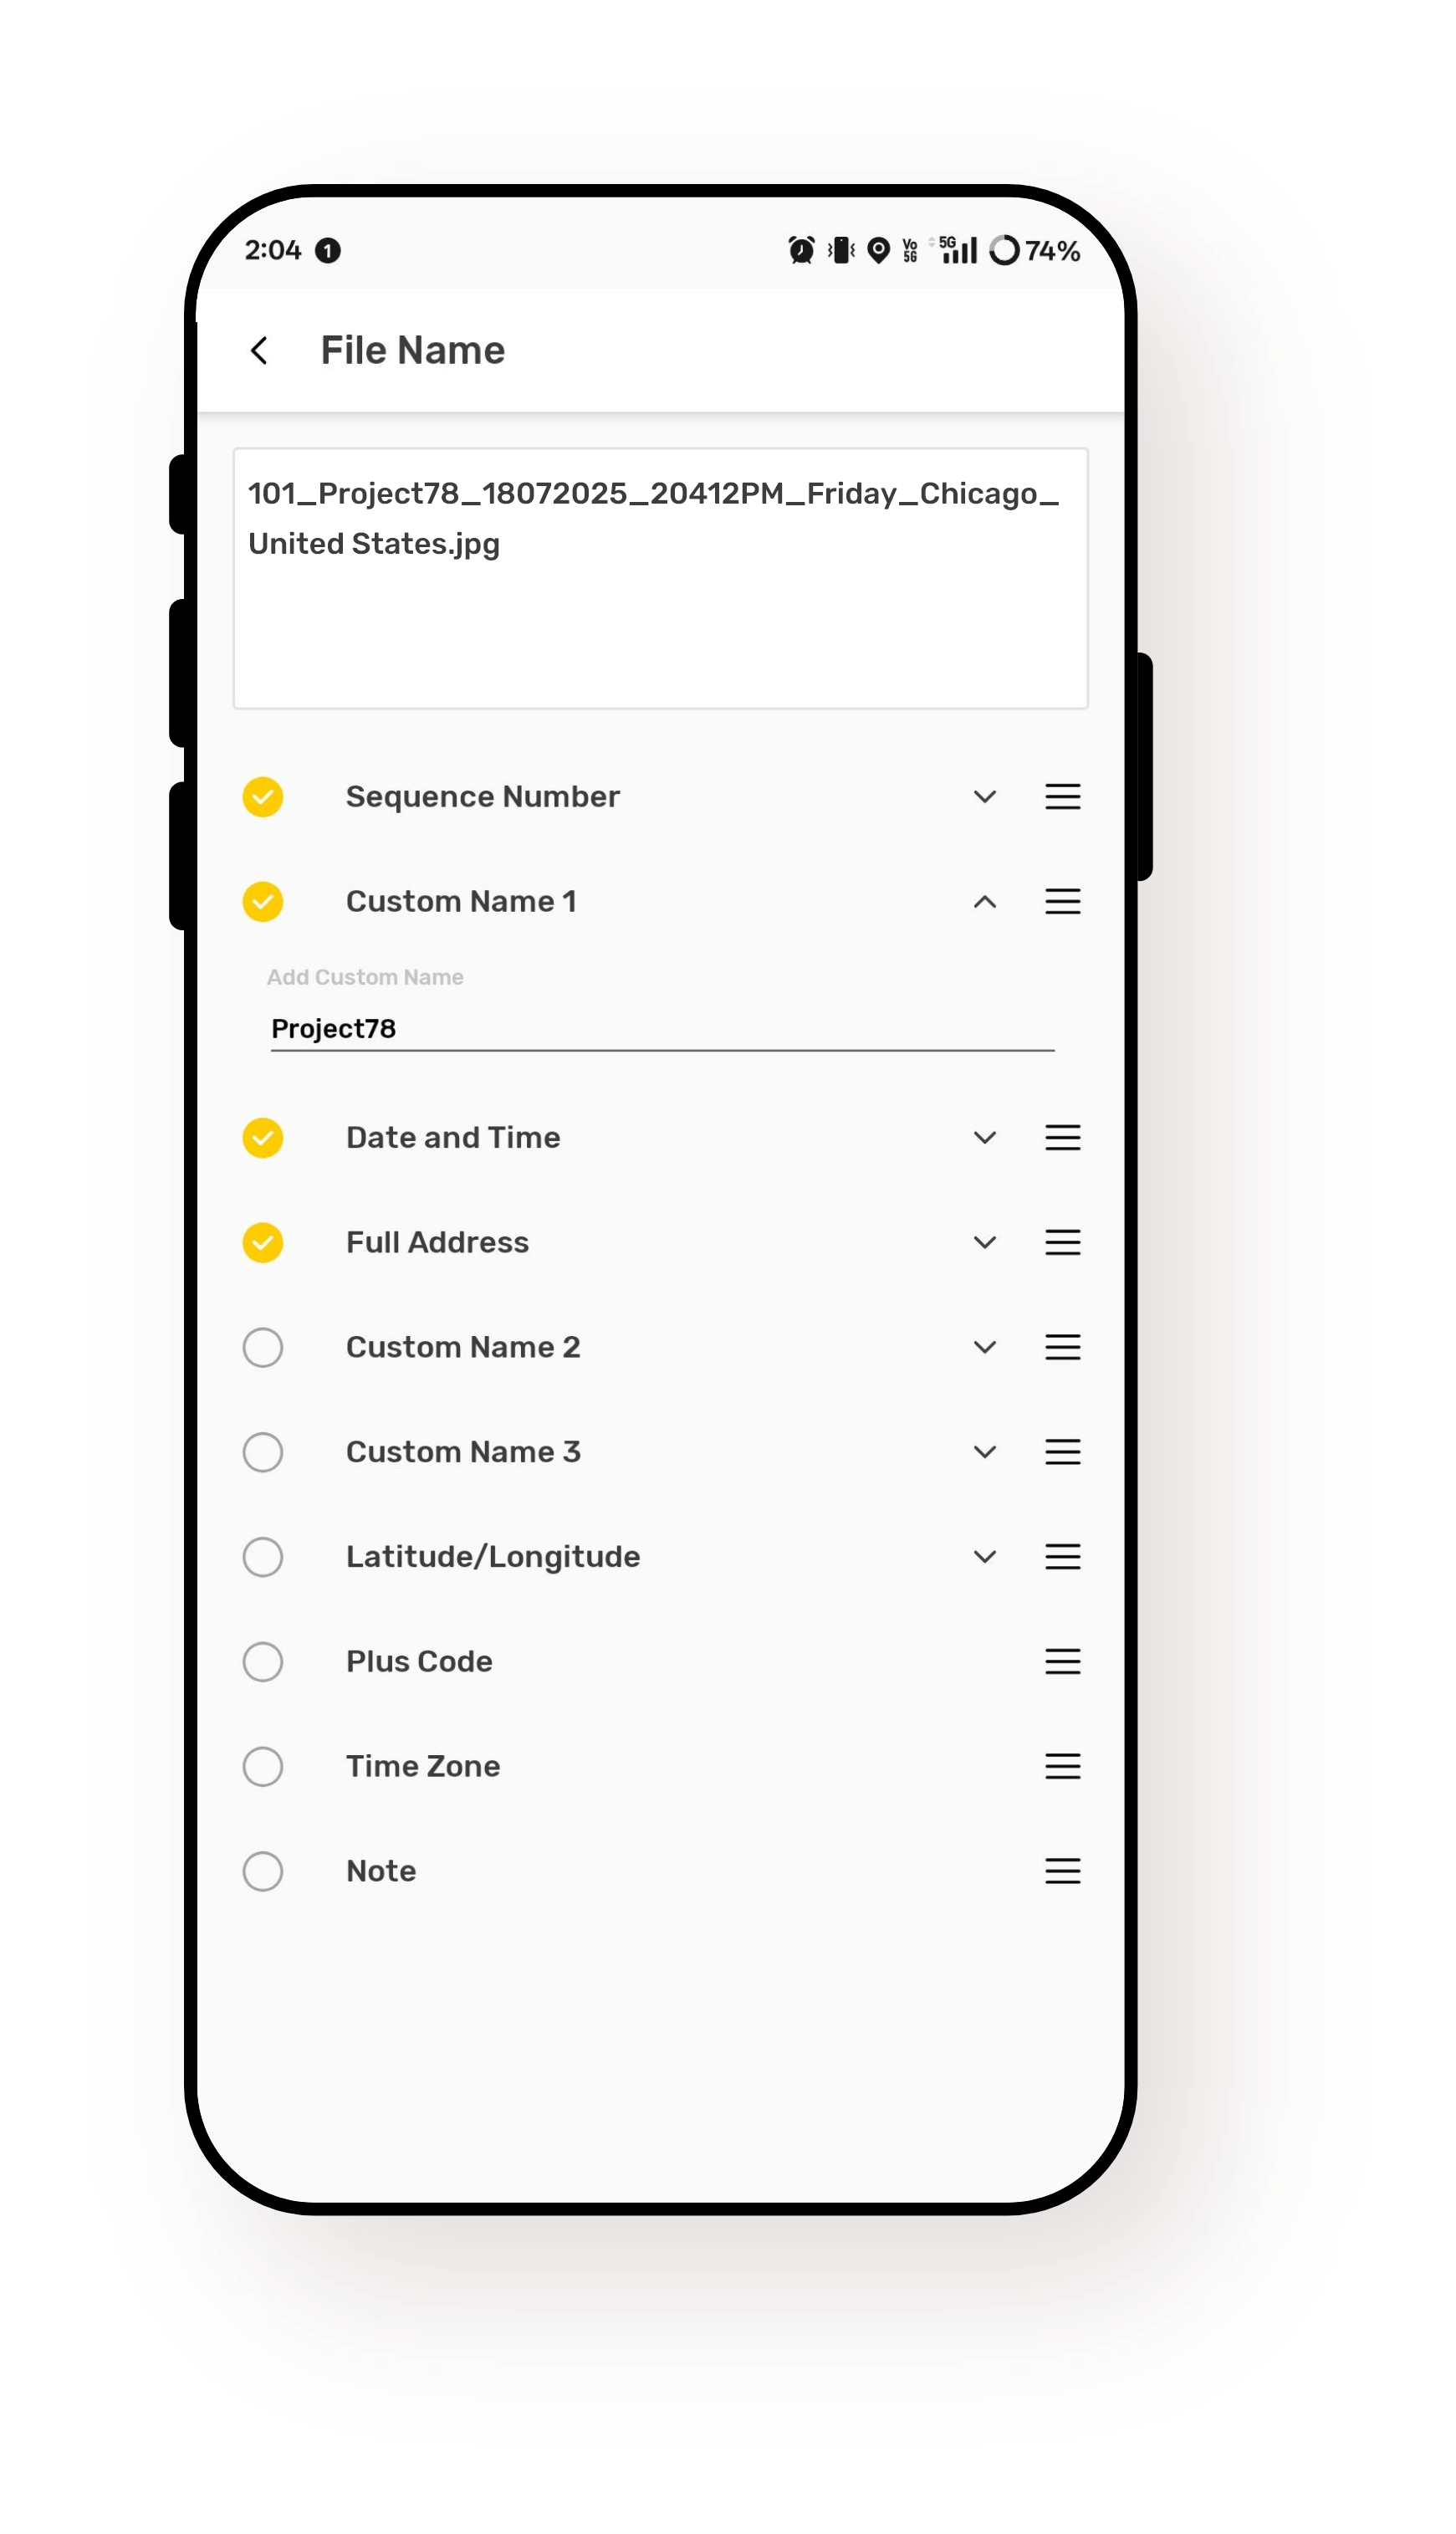
Explore All FeaturesGPS Map Camera automatically names your photos using the location, date, and time from the stamp — no manual work needed. Perfect for professionals who need clean, organized files ready for reports, sharing, or recordkeeping.
No manual renaming
Clean and easy-to-search images
Consistent formatting for reporting or sharing


See how GPS Map Camera’s powerful interface makes your images more than just pictures—each one is an authentic, accurate snapshot with automatic stamps.

We believe in transparency. Here are answers to the questions our users ask most.
Explore how people across industries use our app to get accurate, authentic photo documentation.
Super helpful for logging my location and time while working off-site. Plus the file naming is a lifesaver!

I love how my photos show exactly where and when they were taken. It makes my posts more real — and my memories more organized.

Clients trust me more when I send geo-stamped images. It’s added professionalism to my entire work process.

Exactly what I needed! Now every project photo I take includes GPS, time, and location. It’s become a daily part of my workflow.

If you’ve recently purchased a device compatible with the ZH LW03 remote control—commonly paired with LED strip lights, projector screens, or certain smart home IR controllers—finding the original 2021 manual can be challenging. Many manufacturers release universal “ZH” series remotes, and the LW03 model is a popular variant from 2021.
This article serves as a comprehensive replacement manual for the ZH LW03 remote control (2021 edition). We’ll cover button functions, pairing instructions, battery replacement, common issues, and where to download the official PDF.
Here’s a concise write-up for the ZH LW03 Remote Control (2021 model) based on common features found in universal/set-top-box remotes from that period. If you need specific button mappings or programming codes, please refer to the device’s original packaging or contact the supplier.
To link with Amazon Alexa or Google Home:
Most 2021 ZH LW03 remotes use a learn mode for RF pairing. Follow these steps:
⚠ WARNING: Do not submerge in water. While it works through walls, it is not waterproof. Keep away from curious toddlers who love to press buttons. zh lw03 remote control manual 2021
Thank you for choosing ZH-LW03. Go forth and control the light.
The is a specialized infrared (IR) and radio frequency (RF) remote control designed specifically for Chigo air conditioning units. While it is a sophisticated replacement for the original, its "story" is one of simplicity and functional reliability rather than complex programming. Core Story: The No-Programming Solution
Unlike universal remotes that require entering codes from a manual, the
is built with pre-programmed IR codes that match the industry standard for the Chigo series. This makes it a "plug-and-play" device where the setup typically involves nothing more than inserting batteries. Key Specifications & Performance
Operating Range: It allows control from a distance of over 8 metres. ZH LW03 Remote Control Manual 2021: Complete User
Durability: Constructed from high-grade ABS material, it is engineered to be wear-resistant and can maintain functionality in temperatures up to 105°C.
Power: It requires 2 AAA batteries (usually not included in the package).
Connectivity: Uses Infrared technology to communicate directly with the AC unit. Operating Instructions & Maintenance
Although a physical manual is often absent from the packaging, the operation is intuitive:
Immediate Use: Insert fresh AAA batteries. In most cases, the remote will immediately control your Chigo AC without further setup. Voice Control Setup To link with Amazon Alexa
Button Features: Provides access to all standard AC features, including temperature control, fan speed, timer, and sleep mode. Care Tips:
Avoid direct sunlight and temperatures above 40°C or below 0°C to prevent deformation.
Do not use harsh chemicals like benzene or paint thinner for cleaning; instead, use a slightly damp cloth with neutral detergent.
If the remote becomes unresponsive, first check or replace the batteries.
For those using similar ZH-series remotes (like the ZH/JT-03), you can often toggle between Celsius and Fahrenheit by holding the "Mode" or "Settings" button for 3-5 seconds until the display blinks.
Before using the remote, install the batteries correctly:
⚠️ Important warning from the 2021 manual:
Do not mix old and new batteries. Remove batteries if the remote will not be used for over one month to prevent corrosion.