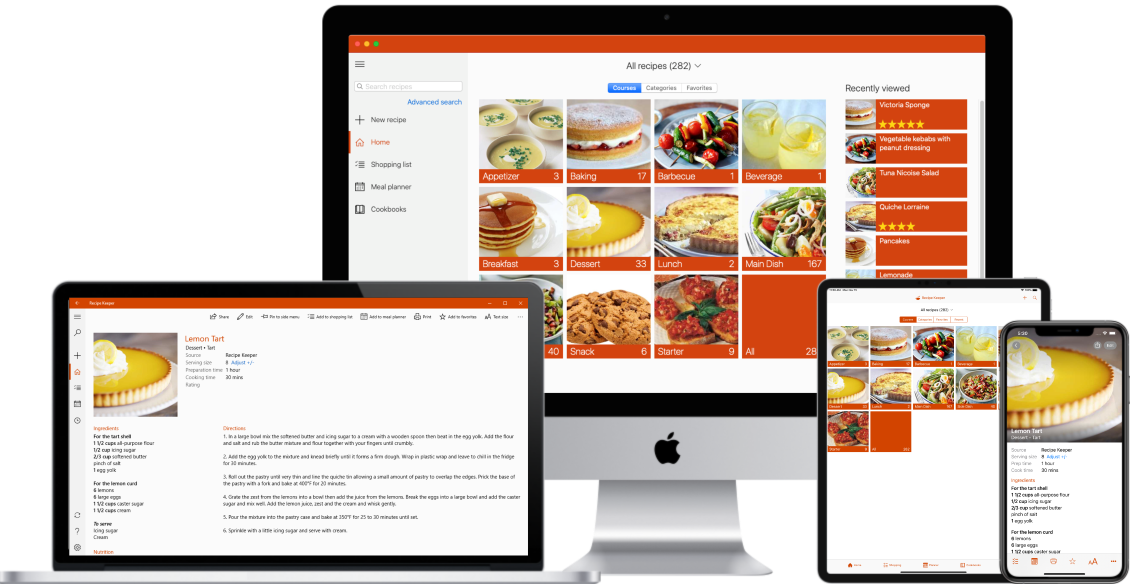
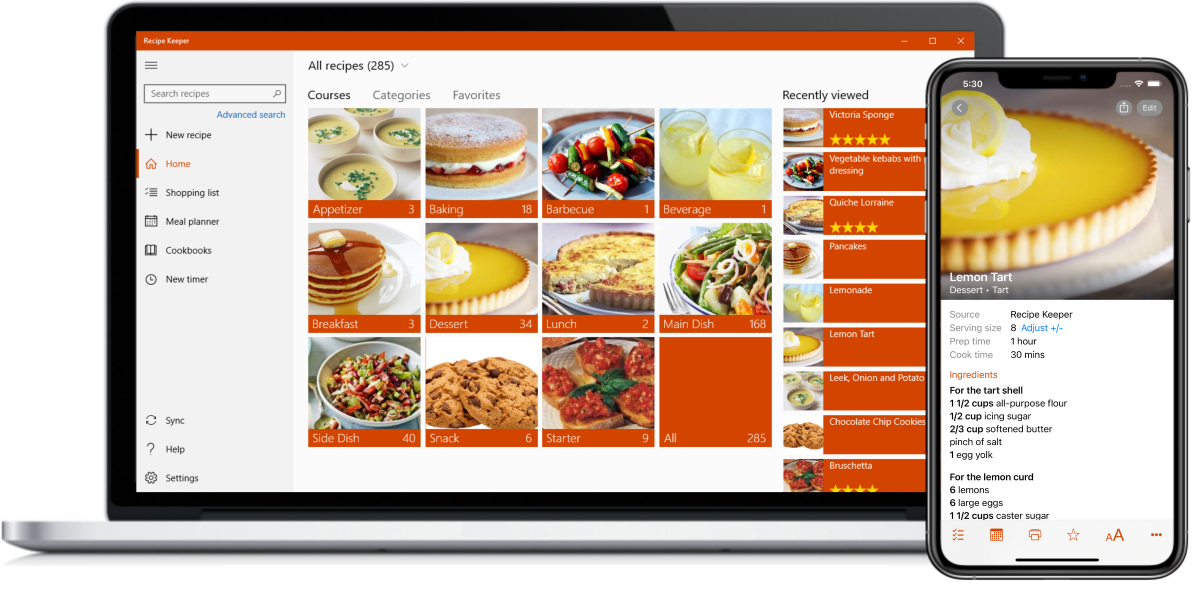
Recipe Keeper is the quick and easy way to collect, organize and share all your favorite recipes across your mobile, tablet, PC and Mac.
Try it free today!


⭐⭐⭐⭐⭐ 50,000+ 5-star ratings
(App Store • Google Play • Microsoft Store)
The Nokia 7250 IXR-X1 is a high-speed, high-density 1RU platform used primarily as a leaf node in data centers and for 5G interconnectivity. Installation involves both physical hardware mounting and software initialization, typically utilizing the Nokia Service Router Linux (SR Linux). Hardware Installation Overview
The physical installation must follow the specific 7250 IXR-X series procedures. Key hardware features include: Chassis Mounting: Standard 1RU rack-mount design.
Power Supplies: Support for dual removable AC or LVDC PSUs with 1+1 redundancy
Cooling: Equipped with N+1 hot-swappable fans that support either front-to-back or back-to-front airflow.
Boot Media: Unlike standard 7250 IXR systems that use SD cards, the 7250 IXR-X1 boots from an internal SSD. Software Installation & Initialization
Software is typically pre-installed on the internal SSD, but initial imaging or recovery can be performed using an external recovery SD card. Recovery/Initial Imaging:
Insert an SD card containing a valid SR Linux recovery image into the external slot of the Control Plane Module (CPM). Connect to the console port and reboot.
Access the BIOS boot menu (usually by pressing the up arrow or DEL/ESC during the Nokia banner) and select the USB/SD card as the primary boot device.
The system will automatically run the rescue process and install the image onto the internal SSD.
Zero Touch Provisioning (ZTP): Once physically connected and powered, the router can automatically obtain its configuration and software image from a ZTP server. Critical Resources
For the full detailed procedures, refer to the following official documentation hubs:
7250 IXR Hardware Documentation Hub: Primary source for chassis installation manuals and supplementary hardware guides.
SR Linux Software Installation Guide: Detailed steps for initial imaging and upgrades.
Nokia 7250 IXR-X Datasheet: Technical specifications for port density and capacity. 7250 IXR Hardware Documentation Hub
At the console login prompt:
login: admin
password: (none – press Enter)
You are now in the Linux shell (bash). To enter the SR Linux CLI:
sr_cli
Need help? Contact Nokia Technical Support: 1-888-665-4252 (US) or your local support center.
This concludes the basic installation procedure for the Nokia 7250 IXR X1. nokia 7250 ixr x1 installation guide
Nokia 7250 IXR X1 Installation Guide
Table of Contents
1. Introduction
The Nokia 7250 IXR X1 is a high-performance, modular routing platform designed for service providers and large enterprises. It offers advanced routing, switching, and security features, making it an ideal solution for building scalable and reliable networks. This guide provides step-by-step instructions for installing the Nokia 7250 IXR X1.
2. Pre-Installation Checklist
Before starting the installation, ensure that:
3. Unpacking and Inventory
4. Hardware Installation
5. Cable Installation
6. Initial Configuration
7. Troubleshooting
Conclusion
The Nokia 7250 IXR X1 is a complex device that requires careful installation and configuration. By following this guide, you should be able to successfully install and configure the device. If you encounter any issues or have questions, refer to the Nokia 7250 IXR X1 documentation or contact Nokia support.
The Nokia 7250 Interconnect Router (IXR)-X1 is a high-density, compact 1RU platform designed for multi-terabit interconnectivity in data centers, WANs, and 5G edge computing nodes. With a full-duplex capacity of 4.8 Tb/s, the
serves as a critical leaf node or aggregation point for high-performance networks. Hardware Installation Prerequisites
Before beginning the physical installation, ensure the environment meets the following standard requirements for the Nokia 7250 IXR-X series: Rack Space: 1RU (standard 19-inch rack).
Operating Temperature: 0°C to +40°C (+32°F to +104°F) sustained. Humidity: 5% to 95%, non-condensing. Power Feeds: Dual redundant Power Supply Units (PSUs). AC Option: 200 V AC to 240 V AC (rated), 50/60 Hz. DC Option: -48 V DC to -60 V DC. The Nokia 7250 IXR-X1 is a high-speed, high-density
Airflow: Front-to-back or back-to-front, depending on the specific modular fan units installed. Physical Installation Steps 1. Mounting the Chassis 7250 IXR-X1 is designed for 4-post or 2-post rack mounting.
Attach the provided mounting brackets to the sides of the chassis.
Slide the unit into the rack and secure it with appropriate screws.
Ensure that the honeycomb mesh air intakes remain unobstructed to maintain EMI isolation and optimal cooling. 2. Grounding the System
Always connect a grounding cable to the designated grounding lug on the rear of the chassis before applying power. This is vital for safety and to protect the high-performance ASICs from static discharge. 3. Powering the Router
supports concurrent use of AC and DC power supplies for maximum flexibility.
Insert the modular PSUs into the rear slots until they click into place.
Connect the power cables to both feeds to ensure 1+1 redundancy.
Verify the status via the Power Status LEDs on the front panel. 4. Network and Control Port Connections features a high-density port layout:
Service Interfaces: 4 x QSFP-DD 400GE and 32 x QSFP28/QSFP+ (100/40GE) ports.
Transceivers: Supports flexible optical breakouts including 4 x 100GE, 2 x 100GE, and 4 x 25GE/10GE options.
Control Interfaces: Connect to the Console or Management ports for initial configuration. The unit also includes a USB port and an SD slot for storage. Software Boot and Initial Commissioning 7250 IXR-X1
typically boots the Nokia SR Linux or SR OS from an internal SSD.
Zero Touch Provisioning (ZTP): The system supports ZTP for automated deployment. Upon first boot, the router can automatically pull configuration and image files from a network server.
Manual CLI Setup: Access the Nokia MD-CLI through the console port to manually configure IP addresses and routing protocols.
For detailed technical diagrams and specific safety compliance codes, refer to the 7250 IXR Hardware Documentation Hub or the official Nokia 7250 IXR-X Series Data Sheet. Software Installation Guide - Nokia Documentation Center
The Nokia 7250 Interconnect Router-X1 (IXR-X1) is a 1RU, high-density platform designed for 5G, data center leaf nodes, and multi-access edge computing, offering up to 4.8 Tb/s throughput. Installation requires securing the chassis, ensuring 1+1 power redundancy, proper grounding, and utilizing either SR Linux or SR OS with support for Zero Touch Provisioning. For comprehensive installation and safety documentation, visit the Nokia 7250 IXR Hardware Documentation Hub. 7250 IXR Hardware Documentation Hub Locate the grounding studs (usually on the rear
The Nokia 7250 IXR-X1 is a high-density, 1RU fixed-configuration interconnect router designed for data center, WAN, and edge computing environments. This guide provides the essential steps for physical installation, cabling, and initial setup based on official hardware documentation. 1. Hardware Overview & Specifications 7250 IXR-X1
is part of the IXR-X series, offering high-performance throughput in a compact form factor. Form Factor: 1RU (4.5 cm / 1.75 in height). System Capacity: Up to 9.6 Tb/s (Half Duplex). Interface Ports: 4 x 400GE QSFP-DD ports. 32 x 100/40GE QSFP28/QSFP+ ports.
Control Interfaces: Console, management port, USB, and an internal SD/SSD slot for booting.
Redundancy: Dual hot-swappable Power Supply Units (1+1) and three modular replaceable fans. 2. Pre-Installation Requirements
Before beginning the physical installation, ensure the following site requirements are met:
Power: Modular AC (200V to 240V) or DC (-48V to -60V) power feeds.
Cooling: The unit supports both front-to-back and back-to-front airflow options. Ensure the rack provides adequate ventilation for the selected airflow direction. Space: Standard 19-inch rack mounting space is required. 3. Physical Installation Steps
For detailed chassis-specific instructions, refer to the Nokia 7250 IXR-X Chassis Installation Guide . Mounting the Chassis:
Attach the provided mounting brackets to the sides of the IXR-X1 chassis.
Lift and slide the chassis into the rack, securing it with rack screws. Grounding the Unit:
Connect a grounding cable to the designated grounding lug on the rear of the chassis to prevent electrical damage. Installing Power Supplies (PSUs):
Insert the modular AC or DC PSUs into the rear slots until they click into place.
Connect the power cords to the PSUs and secure them using the built-in clips. Connecting Management and Console:
Plug a standard RJ-45 console cable into the Console port for initial CLI access.
Connect the Management port to your out-of-band management network. 4. Initial Software Setup & Booting 7250 IXR-X1 typically boots SR Linux from an internal SSD. 7250 IXR Hardware Documentation Hub
If you want step-by-step images, model‑specific button sequences, or download links for Nokia PC Suite/firmware for a particular variant (7250 / iXR / X1), tell me which exact model and I’ll provide that information.
(Invoking related search terms for this topic.) functions.RelatedSearchTerms("suggestions":["suggestion":"Nokia 7250i manual PDF","score":0.9,"suggestion":"Nokia iXR battery replacement guide","score":0.6,"suggestion":"Nokia X1 firmware download","score":0.6])
Title: Step-by-Step Installation Guide: Nokia 7250 IXR X1 (Hardware Setup)
Date: [Insert Date] Author: [Your Name/Team] Category: Networking / Hardware Deployment
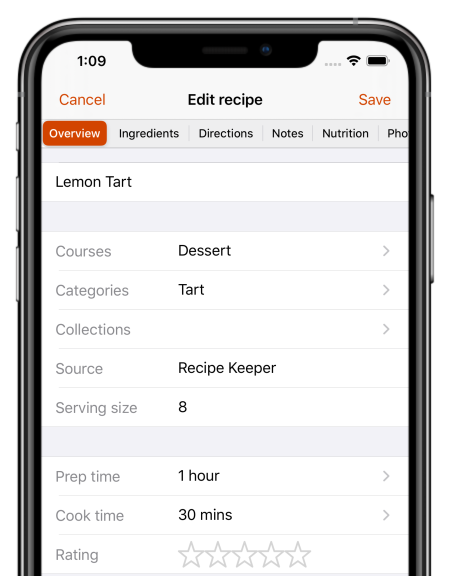
Enter your recipes with as little or as much information as you like.
Copy and paste recipes from your existing documents or apps.
Categorize your recipes by course and category.
Add photos, rate your recipes and flag your favorites.
Import recipes automatically from other recipe apps.
Search for recipes on the web, Instagram and TikTok and add them straight to your collection.
Hundreds of popular recipe websites supported.
Once added you can customize a recipe to suit your needs.

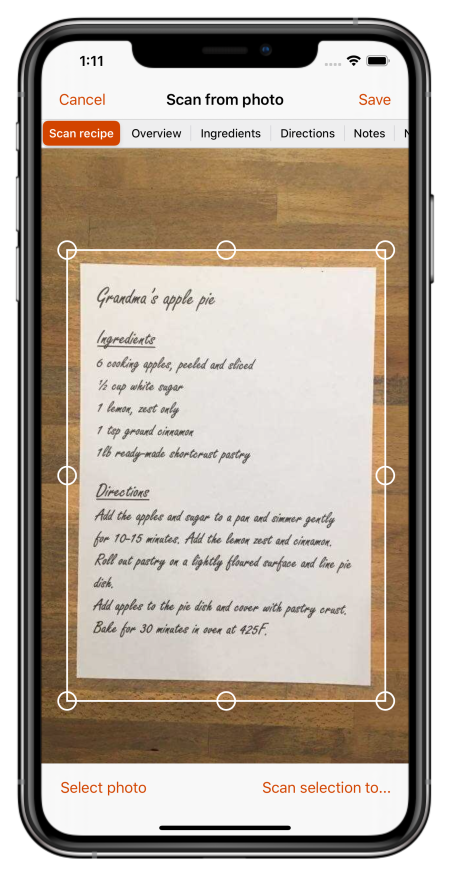
Scan recipes using your phone's camera or from your existing photos and PDF files.
OCR technology automatically converts images to text.
Keep all your favorite family recipes safe forever.
Quickly lookup your recipes by name, ingredient or directions or simply browse your recipes by course, category and rating.
Got some leftovers in the fridge? Search for a recipe to use them up.
Cook more of your favorite meals and rediscover those long forgotten recipes to make meal times interesting again.

Share recipes by email or on your favorite social networks.
Add recipes from other Recipe Keeper users with a single tap.

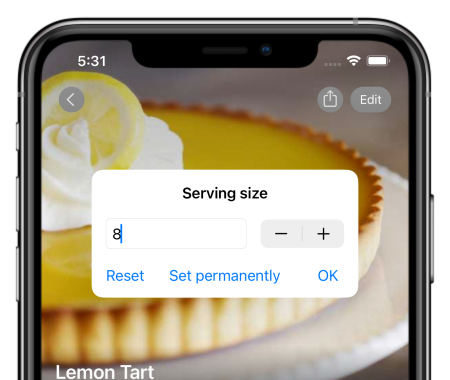
Adjust a recipe serving size up or down and let Recipe Keeper automatically recalculate your ingredients for you!
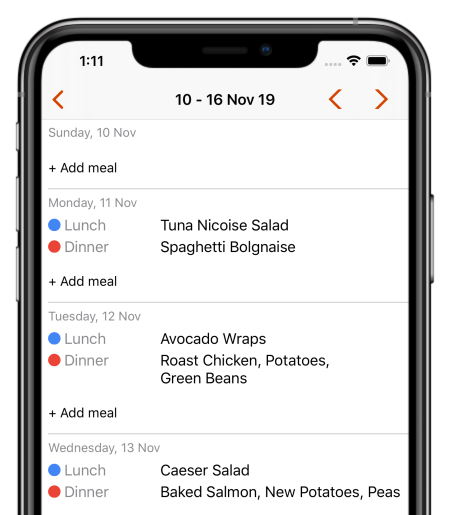
Integrated weekly and monthly meal planner allows you to plan your meals in advance.
Add all the ingredients from your meal planner to your shopping list in one step.
Share your meal plan with all your family.
Get rid of that "what should I cook tonight?" feeling.
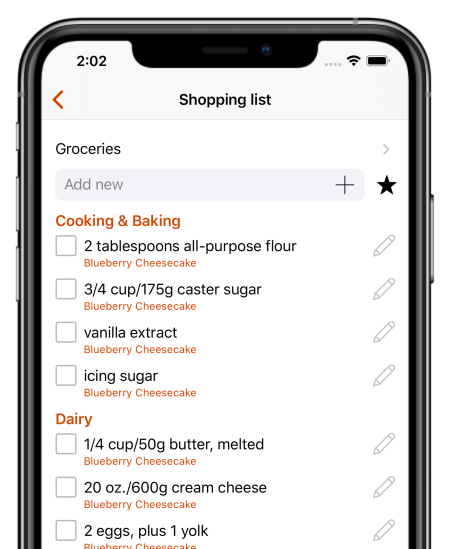
Fully featured shopping list that automatically groups your items by aisle.
Supports multiple shopping lists - create a separate shopping list for each store.
Quickly add your regular items to your list with the favorites button.
Save money by only buying what you need.
No more trips back to the store for that one thing you forgot.
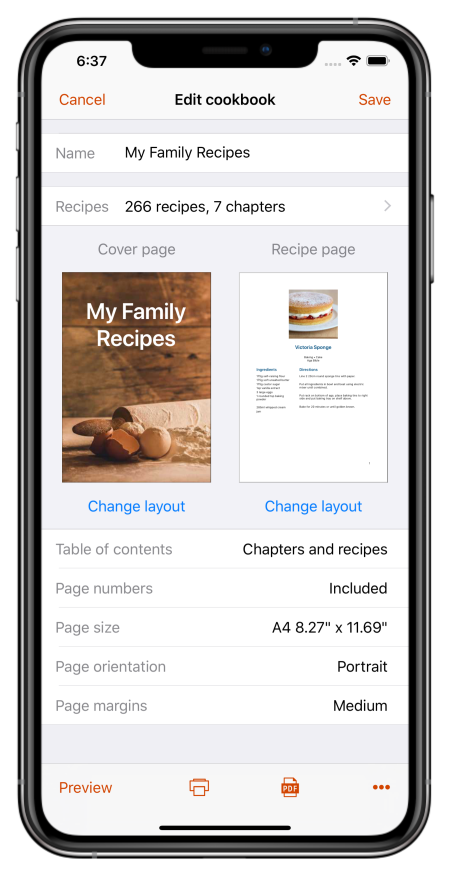
Create cookbooks of your recipes for printing or sharing as a PDF file.
Customizable recipe layouts with your choice of fonts, colors, page sizes and more.
Design your own cover page, add chapters, custom text pages, table of contents and page numbers.
The perfect gift for your family and friends.
Search your recipes and cook hands-free with step-by-step instructions using the Recipe Keeper skill for Amazon Alexa (English language only).

Share your recipes, shopping lists and meal planner across your iPhone, iPad, Android phone and tablet, Windows PC and Mac.